[ad_1]
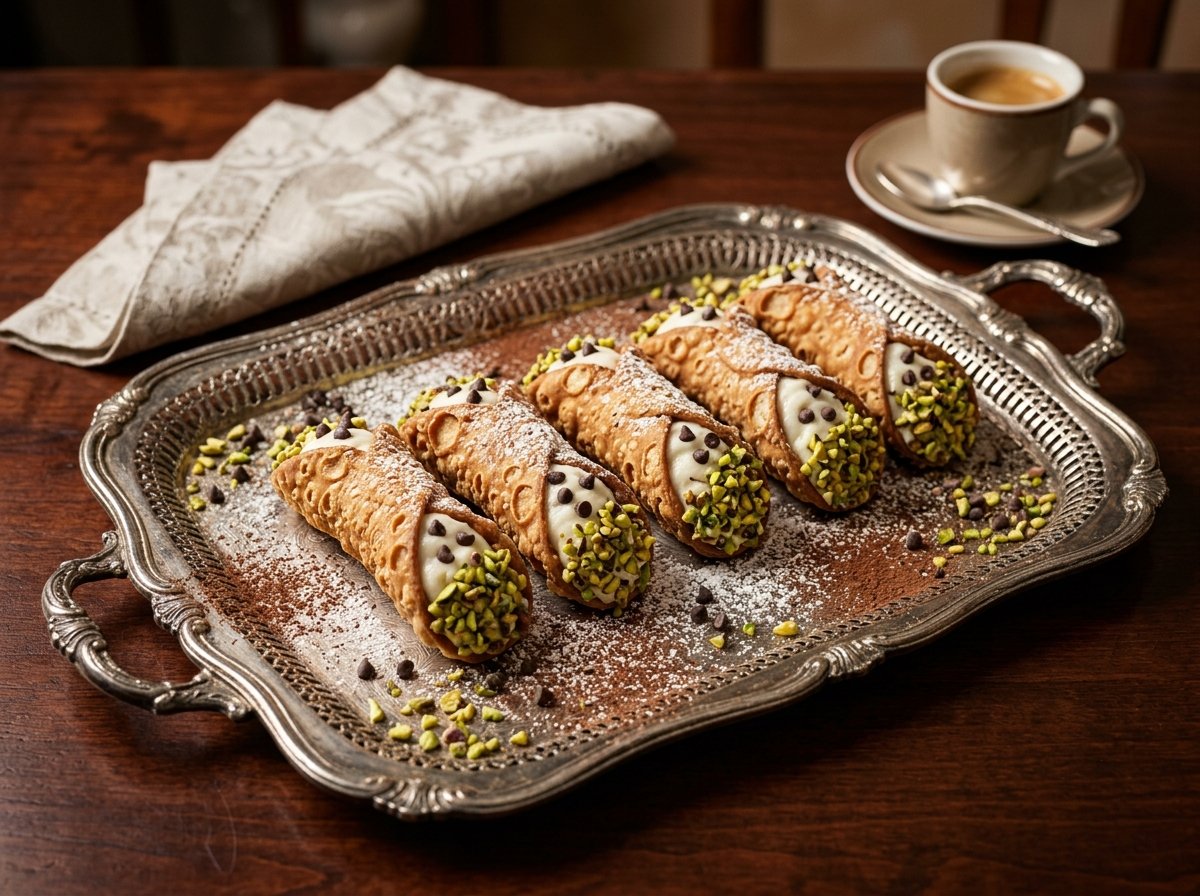
Classic Cannoli
Cannoli are one of the most cherished desserts in Italian cuisine, known for their crispy, shell-like exterior and sumptuous, creamy filling. These iconic treats are a sweet delight that tantalizes the taste buds with their perfect balance of rich, sweet, and velvety flavors. Much like a delightful pastry hug, each bite promises a satisfying crunch, followed by a smooth and sweet filling, often rich in ricotta cheese, chocolate chips, or citrus zest. It’s no wonder people adore this classic dessert, making it a must-try recipe for any home baker.
There’s something genuinely special about homemade cannoli. The simple process of frying the pastry shells and filling them with a creamy mixture makes baking feel approachable and rewarding. With a few expert tips, you’ll create crispy shells and luscious fillings that impress friends and family alike. From family gatherings to celebratory events, these cannoli are perfect for any occasion.
Why You’ll Love This Dessert
- Easy dessert recipe for beginners
- Rich and indulgent flavors
- Quick sweet treat that can be made ahead of time
- Perfect for parties or holiday celebrations
- Family-friendly dessert that appeals to all ages
- Simple enough to make any day special
Ingredients
For the Cannoli Shells:
- 2 cups all-purpose flour
- 2 tablespoons granulated sugar
- 1/2 teaspoon salt
- 1 tablespoon unsweetened cocoa powder (optional for chocolate shells)
- 3 tablespoons unsalted butter, softened
- 1 large egg white
- 1/2 cup white wine or vinegar
- Oil for frying
For the Filling:
- 15 oz ricotta cheese (drained)
- 1 cup powdered sugar
- 1/2 cup mini chocolate chips
- 1 teaspoon vanilla extract
- Grated zest of 1 orange (optional)
Optional Toppings:
- Chopped pistachios
- Cocoa powder for dusting
Step-by-Step Instructions
- Make the Shells: In a mixing bowl, combine flour, sugar, salt, and cocoa powder if using. Add the softened butter and mix until crumbly. Stir in egg white and wine/vinegar until a dough forms. Knead the dough on a floured surface until smooth, then wrap it in plastic and refrigerate for 1 hour.
- Roll and Cut: After chilling, roll the dough out thinly. Cut into circles about 4 inches in diameter. Use a pastry cutter to create decorative edges if desired.
- Fry the Shells: Heat oil in a deep pan over medium-high heat. Wrap each dough circle around a cannoli tube, sealing the edges with a little water. Fry until golden brown, then remove and drain on paper towels.
- Prepare the Filling: In a bowl, combine ricotta cheese, powdered sugar, chocolate chips, vanilla extract, and orange zest. Mix until smooth and creamy. You can use a stand mixer or electric hand mixer for a fluffier texture.
- Fill the Shells: Once the shells are cool, carefully remove them from the tubes. Fill each shell with the ricotta filling using a piping bag or a spoon.
- Serve and Enjoy: Dust with cocoa powder or top with chopped pistachios right before serving to add a decorative touch.
Pro Tips & Common Mistakes
- Ensure your ricotta is well-drained to avoid a runny filling.
- Fry the shells at the proper temperature to achieve that perfect crispness—too low, and they absorb oil; too high, and they burn.
- Don’t overfill the shells until just before serving to keep them crispy.
- Leave the fried shells at room temperature for a few hours before filling them for the best texture.
- Store any unfilled shells in an airtight container to maintain their crunch.
Variations
- Chocolate Version: Replace half of the flour with cocoa powder and add chocolate chips to the filling.
- No-Bake Version: Use store-bought shells and make a quick filling with whipped cream mixed with ricotta.
- Vegan Version: Substitute the ricotta with a plant-based cream cheese mixed with powdered sugar.
- Gluten-Free Version: Use gluten-free flour for the shells.
- Low-Sugar Option: Use a sugar substitute in the filling.
Serving Suggestions
These delightful cannoli make for a splendid dessert at parties, potlucks, or family gatherings. Serve them alongside a scoop of vanilla ice cream or a drizzle of chocolate sauce for an extra indulgent touch. They also fit perfectly within a dessert bar during holiday celebrations.
Storage & Freezing
Store the unfilled shells in a cool, dry place in an airtight container to keep them crispy. The filling can be refrigerated for up to 3 days. If you want to prepare ahead, fill the shells just before serving. Unfortunately, cannoli shells do not freeze well once filled; however, the unfilled shells can be frozen for up to 1 month.
Nutrition Information (Approximate)
Calories: 200 | Carbs: 28g | Protein: 4g | Fat: 10g
FAQ Section
- How do I keep my cannoli shells crispy? Store them separately from the filling until right before serving.
- Can I make the filling ahead of time? Yes, the filling can be made up to 3 days in advance and stored in the refrigerator.
- What if my shells are bending? Ensure that the dough is rolled thin enough and fry them properly for a crispy texture.
Conclusion
Now that you have learned the secret to crispy shells and creamy fillings, it’s time to roll up your sleeves and make these delicious cannoli at home. Whether for a special occasion or just a weekend treat, this homemade dessert recipe is sure to impress. Enjoy the sweet rewards of your baking!
[ad_2]