
[ad_1]
Chickpea Salad
Are you searching for a healthy yet satisfying meal option? Look no further than this Refreshing Chickpea Salad for Lunch! Bursting with fresh flavors and delightful textures, this salad combines protein-rich chickpeas, crisp vegetables, and zesty dressing, making it an ideal choice for a wholesome lunch or light dinner. Each bite is a lovely mix of crunch and creaminess that keeps you feeling energized throughout the day.
This salad not only checks all the boxes for taste and texture but also emphasizes nutritional balance. With its colorful ingredients and robust dressing, it’s no wonder people adore this salad. It’s quick, easy to prepare, and can be enjoyed fresh or as part of your meal prep for the week!
Why You’ll Love This Salad
- Healthy salad recipe packed with nutrients
- Quick and easy to prepare
- Meal-prep friendly, great for busy days
- Light and refreshing, perfect for warm weather
- Protein-rich option to keep you full
- Versatile enough for lunch or dinner
Ingredients
For the Salad:
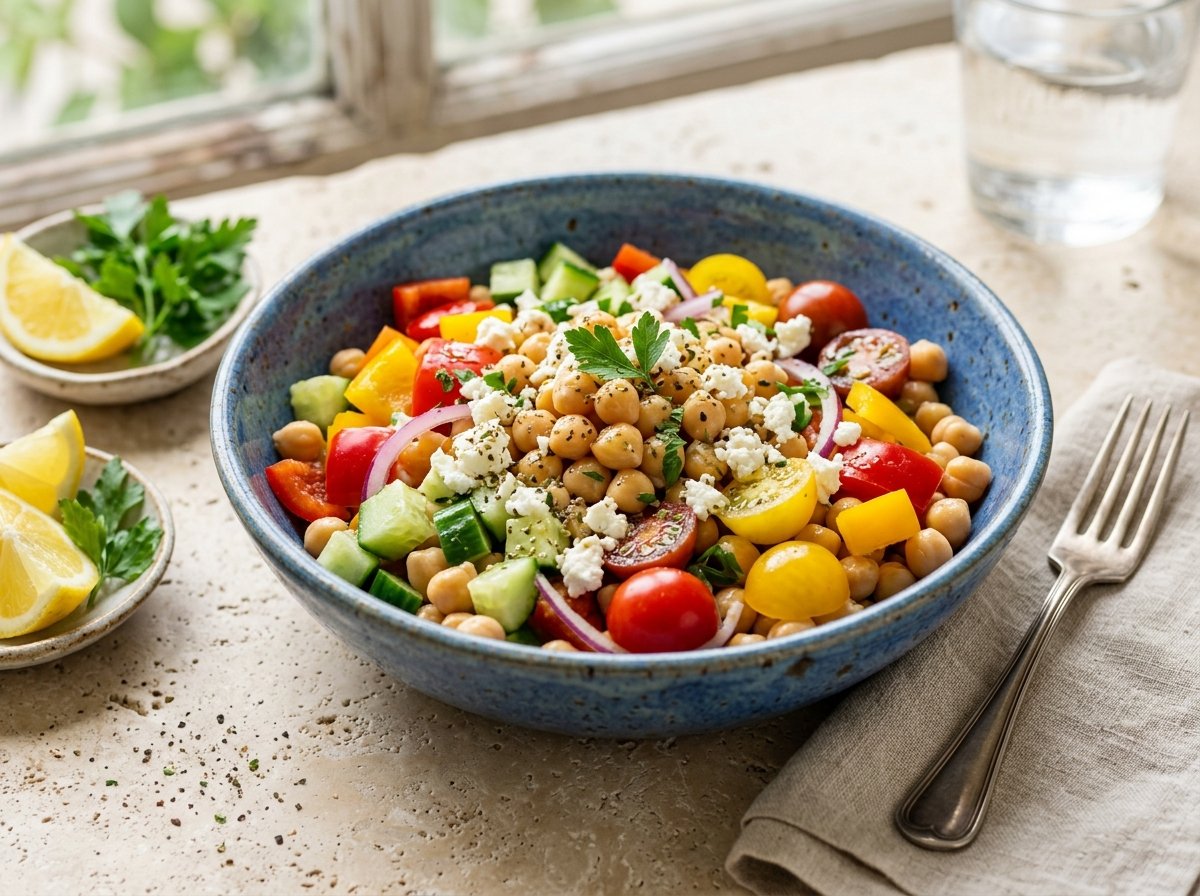
- 1 can (15 oz) chickpeas, rinsed and drained
- 1 medium cucumber, diced
- 1 bell pepper (red or yellow), diced
- 1 cup cherry tomatoes, halved
- 1/4 cup red onion, finely chopped
- 1/4 cup fresh parsley, chopped
- 1/4 cup crumbled feta cheese (optional)
For the Dressing:
- 3 tablespoons olive oil
- 2 tablespoons lemon juice
- 1 teaspoon Dijon mustard
- Salt and pepper, to taste
Step-by-Step Instructions
- In a large bowl, combine the rinsed and drained chickpeas with diced cucumber, bell pepper, cherry tomatoes, red onion, and parsley.
- In a small mixing bowl, whisk together olive oil, lemon juice, Dijon mustard, salt, and pepper to create the dressing.
- Pour the dressing over the salad ingredients and toss gently until everything is well coated.
- If using, sprinkle feta cheese on top and give a final gentle toss.
- Serve immediately, or let sit for 15 minutes to allow the flavors to meld.
Pro Tips & Common Mistakes
- To avoid a soggy salad, add the dressing just before serving.
- Be cautious with the amount of salt and dressing to prevent overpowering the fresh flavors.
- Use fresh vegetables for the best taste and texture.
- Let the salad sit briefly after dressing to enhance flavors without becoming watery.
Variations
- Vegan Option: Omit the feta or substitute it with a non-dairy cheese.
- High-Protein Version: Add cooked quinoa or grilled chicken.
- Gluten-Free Option: This salad is naturally gluten-free!
- Low-Carb Option: Skip the feta and reduce the chickpeas for a lower carb count.
- Spicy Version: Add jalapeño or a dash of hot sauce.
- Pasta Salad Version: Mix in cooked pasta for a more filling meal.
Serving Suggestions
This Refreshing Chickpea Salad is perfect for various occasions:
- Enjoy it as a quick lunch option at home or work.
- Serve as a refreshing side dish for dinner or at BBQs.
- Package it in jars for meal prep throughout the week.
- Take it along for picnics or potlucks—it’s always a hit!
Storage & Refrigeration
To keep your salad fresh, store it in an airtight container in the refrigerator. It will last up to 3 days. Keep the dressing separate until just before serving to maintain the salad’s crunch. Optional toppings, like feta cheese, can also be stored separately to prevent sogginess.
Nutrition Information (Approximate)
- Calories: 270
- Carbs: 30g
- Protein: 10g
- Fat: 15g
FAQ Section
- Can I make this salad ahead of time? Yes, just keep the dressing separate until you’re ready to serve.
- How many servings does this recipe make? This recipe serves about 4 people as a main dish.
- Can I add other vegetables? Absolutely! Feel free to customize it with your favorite veggies.
Conclusion
Now that you have this easy and delicious Refreshing Chickpea Salad for Lunch, it’s time to give it a try! Enjoy the vibrant flavors and healthy ingredients that make this salad a delightful addition to your meal rotation.
[ad_2]